
If you’ve been dreaming of fresh herbs, leafy greens, and even strawberries growing right on your wall or in a sunny corner, a vertical hydroponic system might be your best friend. It saves space, uses less water than soil gardening, and looks beautiful. But with so many options (towers, walls, frames) how do you pick the right one for your home?
This guide breaks it down in simple, practical steps so you can choose with confidence.
Why Choosing the Right System Matters
A good fit means fewer headaches, healthier plants, and better yields. The “perfect” system is the one that matches your space, budget, and routine.
The Main Types of Vertical Hydroponic System
1) Tower Systems
These are freestanding columns with planting pockets around the sides. Water and nutrients circulate from a reservoir up to the top and trickle down over the roots.
Best for: leafy greens, herbs, strawberries.
Pros: compact, clean look, easy to move.
Consider: height (ceiling clearance), pump noise, and access to the top for maintenance.
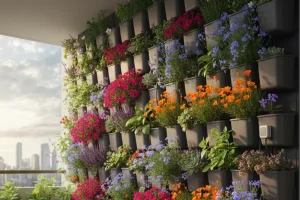
2) Wall-Mounted Panels (“Living Walls”)
These attach to a wall and hold many small plants in pockets or channels.
Best for: herbs and greens near the kitchen.
Pros: stunning feature wall, great use of vertical space.
Consider: water-proofing the wall behind, drip control, and light coverage across the entire panel.
3) A-Frame or Ladder Racks
Plants sit on angled shelves or channels; water flows through channels in a loop.
Best for: maximizing yield in a small footprint.
Pros: high capacity, easy access to plants.
Consider: needs more floor area than a tower, may require stronger lights.
4) Gutter/Channel (NFT) Cascades
Nutrient Film Technique (NFT) runs a thin film of water through sloped channels, with plants in net pots above the flow.
Best for: fast-growing greens and herbs.
Pros: efficient water use, great growth rates.
Consider: less forgiving if the pump stops; roots can dry quickly without flow.
5) Aeroponic Towers
Roots hang in air and are misted with nutrient solution on a timer.
Best for: high oxygen to roots, rapid growth.
Pros: excellent yields and clean roots.
Consider: higher cost, more parts (sprayers can clog), needs reliable timers and filtration.
Key Questions to Guide Your Choice
How Much Space Do You Have?
- Measure height, width, and depth. Remember: towers need ceiling clearance; wall units need splash protection.
- Leave room to work. You’ll need a hand’s width to swap plants, clean, and check the pump.
What Do You Want to Grow?
- Leafy greens & herbs: almost any system works.
- Fruit (strawberries, dwarf tomatoes, peppers): choose towers or aeroponics with stronger lighting and larger planting pockets.
- Large or vining plants: require sturdy support, bigger reservoirs, and more light.
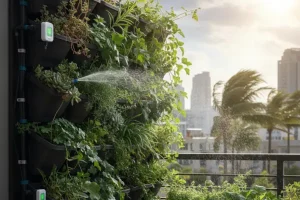
Indoors or Outdoors?
- Indoors: plan for LED grow lights, drip trays, and noise control.
- Outdoors (balcony, patio): pick UV-resistant, food-safe materials, protect the reservoir from heat and consider wind stability.
What’s Your Budget?
- Upfront costs: system, pump, timer, lights (if indoors), starter plugs, nutrients, pH kit.
- Ongoing costs: electricity for pump/lights, nutrients, occasional replacements (pump, tubing, filters).
- Tip: a simple tower with a modest LED panel can be very cost-effective for greens.
How Hands-On Do You Want to Be?
- Beginner-friendly: towers and simple NFT with few parts.
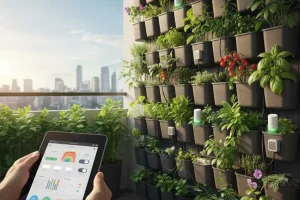
- Tech-curious: aeroponics with timers, sensors, and auto-dosing.
- Maintenance: look for easy disassembly, wide channels, and accessible reservoirs.
Features That Make a Real Difference
1) Reservoir Size
A larger reservoir keeps water temperature and nutrients more stable, and reduces how often you need to top up. For a small indoor setup, 15–40 liters (4–10 gallons) is a comfortable range.
2) Pump and Timer Quality
Quiet, reliable pumps and simple digital timers prevent most headaches. Look for low-decibel pumps and timers with battery backup.
3) Food-Safe Materials
Choose BPA-free, UV-stable, food-grade plastics or stainless steel. It protects you and your plants, especially under bright lights or sun.
4) Light Coverage
If you grow indoors, you’ll need LED grow lights. Focus on even coverage from top to bottom:
- Tall towers: a wrap-around bar light or two side panels.
- Wall units: a light bar per row or a powerful panel hung at the right distance.
- Look for full-spectrum LEDs with dimming and timers.
5) Modularity and Scalability
Can you add more columns later? Swap in larger net pots? Add a second light? Systems that grow with you save money long term.
6) Drainage and Spill Protection
Drip trays, backflow prevention, and tidy tubing help keep floors and walls safe—especially in rentals.
7) Support, Warranty, and Replacement Parts
Choose brands that offer clear manuals, spare parts (spray nozzles, tubing, pumps), and responsive support. A decent warranty is a good sign.
Water and Nutrient Basics
- pH: A measure of how acidic or basic your water is. Most greens love pH 5.8–6.3. A simple test kit plus pH up/down solutions is enough for beginners.
- EC (Electrical Conductivity): Tells you how strong your nutrient mix is. Start mild for seedlings and increase slowly for mature plants.
- Water quality: If your tap water is very hard (lots of minerals), consider a basic carbon filter or mix with distilled/RO water to keep pH stable and avoid salt buildup.
- Temperature: Roots like cool water—ideally 18–22°C (64–72°F). Keep reservoirs shaded and off heat sources.
A Simple Decision Flow
- Measure your space (height × width × depth).
- List your crops (greens only? strawberries too? small fruits?).
- Choose the format:
- Tight footprint, clean look → Tower
- Showpiece kitchen wall → Wall-mounted panel
- Maximum plants per square foot → A-frame or NFT channels
- Fast growth, okay with tinkering → Aeroponic tower
- Plan your light (indoors): match light size and shape to system height and width.
- Pick reservoir size (bigger = more stable).
- Check noise and access (pump hum, space to service).
- Confirm materials (food-safe, UV-stable).
- Add the essentials: timer, pH kit, EC meter (optional but helpful), nutrients, starter plugs, and a small fan for airflow indoors.
Step-by-Step: Setting Up Your First Vertical System
- Place the reservoir on a level surface with easy access. Add a mat or tray to catch drips.
- Assemble the structure following the manual. Keep tubing neat and labeled if possible.
- Install the pump and timer. Test water flow before adding plants. Adjust so all sites get even moisture.
- Mix nutrient solution at beginner strength. Set pH to 5.8–6.3.
- Add seedlings grown in starter plugs (rockwool, coco, or foam). Rinse roots gently before placing.
- Mount lights (if indoors) and set a schedule: 14–16 hours/day for greens. Keep lights the recommended distance to avoid leaf burn.
- Dial in routine:
- Top up the reservoir with fresh water every few days.
- Check pH 2–3 times a week.
- Refresh the whole reservoir every 2–3 weeks.
- Trim roots if they clog channels.
Common Mistakes to Avoid (and Easy Fixes)
- Too little light indoors
Symptom: leggy, pale plants.
Fix: upgrade to a stronger LED or bring lights closer while watching for leaf burn. - Neglecting pH
Symptom: yellowing or slow growth even with nutrients.
Fix: test pH regularly; adjust to the target range. - Undersized reservoir
Symptom: rapid swings in pH and EC; frequent refills.
Fix: step up to a larger reservoir or add a top-up container. - Pump or sprayer clogs (especially in aeroponics)
Symptom: some plants thrive, others wilt.
Fix: add a simple inline filter, clean tubing monthly, and flush with clean water between crops. - Ignoring heat
Symptom: droopy plants, root issues.
Fix: shade the reservoir, move lights farther, or increase airflow. - Overcrowding plants
Symptom: slow growth, poor air movement, pests.
Fix: thin seedlings, choose compact varieties, prune regularly. - No plan for power outages
Symptom: roots dry out fast in NFT/aeroponics.
Fix: keep a cheap battery backup for the pump or a manual watering plan for emergencies.
Example Starter Combos (Pick Your Style)
- Small Apartment, Mostly Herbs
Compact tower with a 60–100W full-spectrum LED bar, 20–30L reservoir, quiet pump, pH kit, and a slim drip tray. - Family Kitchen Feature Wall
Wall-mounted panel with liner behind it, two light bars per row (on timers), 40–60L reservoir in a cabinet, and a moisture sensor for peace of mind. - High-Yield Greens for Meal Prep
A-frame or NFT channels under a 150–240W LED panel, 60L reservoir, clip-on fans for airflow, and weekly harvest rotation. - Tech-Lover’s Speed Garden
Aeroponic tower with digital timer (short, frequent misting cycles), inline filter, and smart plug for remote checks.
Quick Maintenance Cheat Sheet
- Daily: quick look at plant leaves and pump sound; top up water if low.
- Twice weekly: check pH; glance at EC if you have a meter.
- Every 2–3 weeks: replace the nutrient solution, wipe down surfaces, check for salt buildup.
- Each crop cycle: deep clean the system (warm water + mild, plant-safe cleaner), inspect pump and tubing, replace worn parts.
Your Perfect Match Is About Fit, Not Flash
Choosing the perfect vertical hydroponic system comes down to matching space, crops, light, and routine. Towers are tidy and beginner-friendly, wall panels make a gorgeous statement, A-frames and NFT channels pack in production, and aeroponics delivers speed if you like gadgets.
Start with realistic goals, pick food-safe materials, size your reservoir and lights wisely, and keep pH in check. Do that, and you’ll enjoy a steady flow of fresh, homegrown produce, no backyard required.
Hi, I'm Evelyn. I grew up in a house, but life brought me to apartments. In vertical gardening, I’ve found a hobby full of life and fun challenges. It's a way to turn even the smallest space into a green retreat.