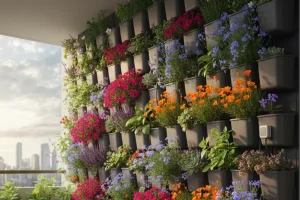
Want fresh lettuce, herbs, and strawberries in a tiny footprint? A DIY NFT tower lets a thin film of nutrient solution flow past plant roots inside a vertical column. It’s clean, water-efficient, and great for small spaces like balconies or patios. This guide uses affordable, easy-to-find parts and beginner-friendly steps so you can build safely and get growing fast.
Why an NFT Tower? (Overview)
- Space-saving: A single column can grow 12–24 plants.
- Water-wise: The same solution recirculates back to the reservoir.
- Fast growth: Constant moisture and oxygen keep roots happy.
- Low mess: No soil. Easy to clean and maintain.
Good for: leafy greens (lettuce, spinach), herbs (basil, parsley, dill), and strawberries.
Not ideal for: heavy fruiting crops like big tomatoes or cucumbers in this compact format.
What You’ll Build
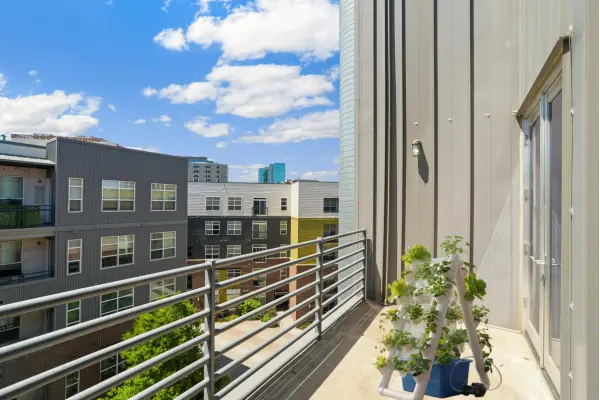
A 5–6 ft (1.5–1.8 m) vertical column sits in the lid of a 5–15 gal (20–60 L) opaque reservoir. A small submersible pump lifts nutrient solution to a drip ring at the top; a thin film wets the inside walls and returns quietly to the tank. 2″ net pots in angled holes hold your plants while roots grow inside the tower.
Materials & Tools
Tower & Reservoir
- 1 × 4″ (100 mm) square PVC fence post, 5–6 ft (1.5–1.8 m)
- Matching post cap for the top
- Opaque, food-safe reservoir with lid, 5–15 gal (20–60 L)
- Optional Uniseal to seat the post in the lid
Water Delivery
- Submersible pump: 250–300 GPH (600–1,200 L/h), sized for your height
- 1/2″ (13 mm) vinyl tubing + barbed tee to make a drip ring
- Optional inline filter
Planting & Seals
- 2″ net pots (18–24 pieces)
- Rockwool, foam collars, or coco plugs
- Aquarium-safe silicone (for minor seals)
Monitoring & Safety
- pH test kit + pH up/down
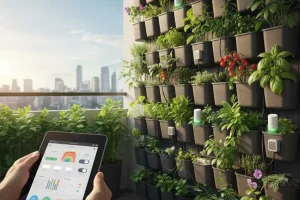
- Optional EC/TDS meter
- Timer (optional; many run NFT 24/7)
- Drill, 2-3/8″ (60 mm) hole saw, bits, utility knife, sandpaper
- Measuring tape, marker, small level
- Gloves and safety glasses
Plan the Layout (Before You Drill)
- Height: 5–6 ft keeps pumps small and maintenance easy.
- Reservoir: Bigger = more stable pH/EC. If you can, pick 10–15 gal.
- Hole spacing: 7–9 in (18–22 cm) between planting holes; stagger holes on adjacent faces for airflow and light.
- Hole angle: Tilt the hole saw 10–15° upward so net pots sit snug and solution stays inside.
Step-by-Step Build
1) Mark and Drill the Tower
- Choose 2 or 3 faces for planting (leave one blank if the tower will sit near a wall).
- Start your first hole 8–10 in (20–25 cm) above the base.
- Mark holes every 7–9 in (18–22 cm) up the tower; stagger on neighboring faces.
- Drill with the 2-3/8″ (60 mm) hole saw at a slight upward angle.
- Deburr and smooth edges with a knife and sandpaper to protect stems and roots.
2) Prepare the Reservoir
- Place the pump inside and route tubing through a notch or hole in the lid.
- Cut a snug opening for the tower: use a Uniseal or a tight square hole.
- Add a simple splash diffuser (mesh or a slanted scrap of plastic) under the return to keep things quiet.
3) Build the Top Drip Ring
- Run tubing up the inside of the tower to the top.
- Make a small loop with the barbed tee.
- Poke 4–6 tiny holes (≈2 mm) pointing outward to wet the inner walls evenly.
- Test on a bucket: you want a gentle sheet, not jets.
4) Dry-Fit, Level, and Leak-Check
- Seat the tower in the lid; check it’s plumb with a level.
- Fill the reservoir with plain water and run the pump for 15–20 minutes.
- Fix splashes or seeps with silicone. Adjust hole size/number for even flow.
5) Mix Nutrients and Plant
- Refill with fresh water; add hydroponic nutrients per label for greens.
- Aim for EC 0.8–1.2 mS/cm (≈400–800 ppm) and pH 5.8–6.3.
- Set seedlings in 2″ net pots with media. Pot bottoms should just touch the film or sit within 1 cm so roots find moisture quickly.
6) Set the Flow
- Target 15–30 GPH (1–2 L/min) at the top.
- Many beginners run 24/7 for simplicity and steady oxygen. If using a timer, try 15 min on / 15–45 off and watch plant response.
Operation & Care (Simple Routine)
- Daily glance: Leaves perky? Any drips on the lid or floor? Pump humming normally?
- Top-ups: Add plain water as the level drops. Mark a “full” line on the tank.
- Weekly: Check pH (5.8–6.3), peek at EC if you have a meter, clear any tiny clogs in the drip ring with a toothpick.
- Every 2–3 weeks: Replace the full reservoir. Wipe the tower interior and ring, then run clean water before refilling with nutrients.
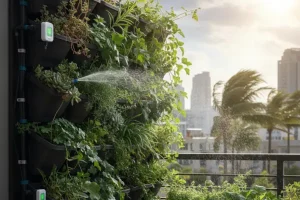
- Water temperature: Keep between 64–72°F (18–22°C) for happy roots. Shade the tank if it warms up.
Light: Outdoors, choose bright but not scorching spots. Indoors, use full-spectrum LED bars so all faces get even light (12–16 hours for greens).
Troubleshooting (Quick Fixes)
- Top plants wilt / dry net pots
Cause: Low flow or clogged ring.
Fix: Increase flow slightly and clear holes; confirm pump is strong enough for your tower height. - Algae on media
Cause: Light hitting wet surfaces.
Fix: Use opaque collars; reduce light spill into the tower and reservoir. - Foam or odor in tank
Cause: Warm or old solution.
Fix: Change solution, cool/shade the reservoir, improve airflow. - pH keeps drifting
Cause: Small tank or hard tap water.
Fix: Use a larger reservoir or mix with RO/distilled water; check nutrient freshness. - Uneven growth around the column
Cause: Light strongest on one side.
Fix: Rotate the tower twice a week or add a second light.
Common Mistakes to Avoid
- Too many holes, too close → crowding and shade. Stick to 7–9 in spacing.
- Waterfall at the top → drowns media, splashes. Aim for a thin, quiet film.
- Clear reservoir → algae. Choose opaque and keep it shaded.
- Skipping edge smoothing → stems get scraped. Always de-burr holes.
- Tiny reservoir → wilder pH/EC swings. 40–60 L is smoother than 20 L.
Safety Note
- Use a GFCI outlet and a drip loop on cords.
- Keep the pump fully submerged when running.
- Wear glasses and gloves when drilling and handling PVC.
- Follow local rules for outdoor electrical use.
Cost Savers & Easy Upgrades
- Save: 4″ square fence posts are cheaper than specialty towers and drill cleanly.
- Save: Start with a 5 gal (20 L) bucket; upgrade later for stability.
- Upgrade: Inline filter to reduce clogs; quick-disconnect on tubing for quick cleaning.
- Upgrade: Add a float valve with a small top-off container for steady water level.
Simple Starter Plan (Copy This)
- Build a 5 ft tower with 2 faces of holes, 9 holes per face (18 plants).
- Use a 10 gal (40 L) reservoir and a 250–300 GPH pump.
- Plant butterhead lettuce, basil, parsley, and strawberries (top third for strawberries).
- Run 24/7, keep pH 5.8–6.2, and change solution every 2–3 weeks.
- Rotate the tower 90° twice a week for even light.
FAQ (Quick Answers)
Is NFT noisy?
No—if the return is diffused and the ring is gentle, it’s a soft trickle.
Do I need a timer?
Optional. Many beginners run continuous flow for simplicity and stable oxygen.
What if the power goes out?
Have a simple plan: hand-water the top pots gently until power returns.
Can I grow indoors?
Yes. Use full-spectrum LED bars and keep water temps in the 64–72°F range.
Conclusion
A DIY NFT tower is a practical way to harvest fresh greens in a small space. With a few careful holes, a steady pump, and a simple routine, you’ll keep roots happy and leaves coming. Start with two faces, dial in a gentle film, and grow your confidence before you scale up. Your future salads will thank you.
Hi, I'm Evelyn. I grew up in a house, but life brought me to apartments. In vertical gardening, I’ve found a hobby full of life and fun challenges. It's a way to turn even the smallest space into a green retreat.