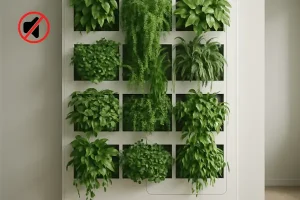
One of the most exciting parts of vertical gardening is the flexibility. Whether you’re setting up a small herb wall in your kitchen or a full display outdoors, mounting systems—like brackets, rails, and planter hooks—make it possible to design a garden that fits your space perfectly.
The good news is that you don’t need expensive equipment or professional help. With a few simple tools and materials, you can build sturdy, attractive mounting systems yourself.
Before you start, map out your wall like a puzzle: find studs or solid masonry, sketch planter positions, and estimate the total “wet weight” (plants + media + water). Choose hardware that matches your surface—masonry anchors for brick, lag screws for studs, or rail systems/French cleats if you want easy rearranging.
Renters can use tension poles or freestanding frames to avoid drilling, while outdoor setups benefit from corrosion-resistant hardware and a small spacer to keep airflow behind the wall. A little planning up front keeps your garden secure, level, and simple to expand later.
Why Mounting Systems Matter
Support:
A good mounting system keeps planters firmly attached to walls, fences, or frames so they won’t wobble, tilt, or fall. Proper anchors and brackets also spread the weight of wet soil and water evenly, protecting both your plants and your wall surface.
Space-saving:
Mounts let you use vertical space that would otherwise stay empty, so you can grow more in small areas. By stacking planters in tidy rows or grids, you free up floors and walkways while still getting a lush, full garden.
Flexibility:
Rails, hooks, and cleats make it easy to move planters around as plants grow or seasons change. You can add new rows, swap crops, or adjust spacing without rebuilding the whole setup.
Aesthetic appeal:
Neat hardware and consistent spacing create a clean, organized look that highlights the plants. Matching finishes (wood, black metal, or white brackets) help your garden blend with your home style and look intentional, not cluttered.
Step 1: Choose the Right Mounting Surface
Before selecting brackets or rails, decide where your vertical garden will go.
- Wooden walls/fences: Easy to screw into, very DIY-friendly.
- Concrete or brick walls: Require wall anchors or masonry screws.
- Balcony railings: Can use clamps or hanging hooks without drilling.
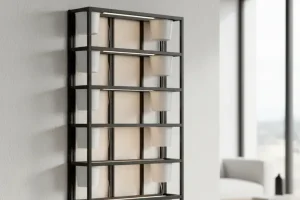
- Free-standing frames: Allow mobility, good for renters.
Step 2: Brackets for Vertical Gardens
Brackets are strong, versatile, and perfect for supporting individual planters.
DIY Bracket Options:
- L-shaped metal brackets (common and affordable).
- Heavy-duty shelf brackets for larger planters.
- Decorative wrought-iron brackets for an aesthetic touch.
Tips:
- Always check weight limits.
- Use rust-resistant screws for outdoor setups.
- For uniformity, space brackets evenly across the wall.
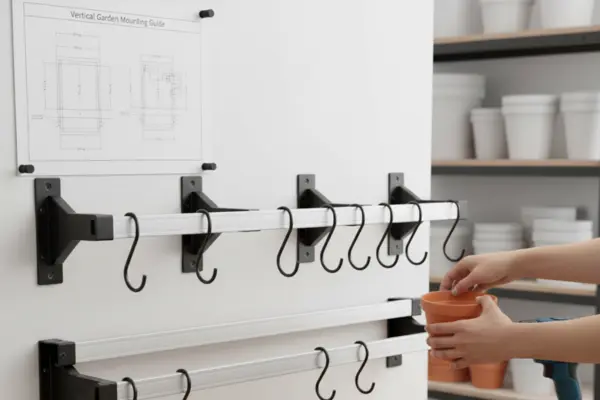
Step 3: Rails for Flexible Systems
Rails act as horizontal tracks that hold multiple planters.
DIY Rail Options:
- Repurposed curtain rods or metal pipes.
- Wooden slats with hooks screwed in.
- Commercial rail systems (kitchen wall rails work well).
Benefits:
- Easy to slide or rearrange planters.
- Great for herb gardens where you may swap plants frequently.
- Works well indoors for a clean, modern look.
Step 4: Planter Hooks
Hooks are the simplest mounting method and ideal for lightweight containers.
DIY Hook Options:
- Screw-in wall hooks for small pots.
- S-hooks for hanging from rails or balcony bars.
- Adhesive hooks (for temporary or rental-friendly setups).
Tips:
- Use strong hooks for ceramic or heavy planters.
- Pair with lightweight pots for safety indoors.
- Mix hook heights to create layered, cascading displays.
Step 5: Safety & Weight Distribution
Vertical gardens look light and airy, but water and soil add weight quickly.
- Use anchors or toggle bolts for heavy setups.
- Distribute planters evenly to prevent wall strain.
- Test each mount with a filled planter before hanging multiple.
Quick Comparison Table
| Mount Type | Best For | Pros | Cons |
| Brackets | Heavy pots, outdoor walls | Sturdy, durable | Fixed position |
| Rails | Flexible herb walls | Adjustable, stylish | Requires secure anchor |
| Hooks | Small/light planters | Cheap, easy to install | Lower weight capacity |
Common Mistakes to Avoid
- Using weak adhesives for heavy pots – unsafe and likely to fail.
- Skipping wall anchors – especially on brick or drywall.
- Overcrowding mounts – puts strain on the system.
- Forgetting about water weight – wet soil is much heavier than dry soil.
FAQs
Q: Can I mount a vertical garden without drilling?
Yes. Use rail clamps for balconies or strong adhesive hooks for lightweight indoor planters.
Q: What’s the safest material for outdoor mounts?
Rust-resistant metal or treated wood holds up best.
Q: How much weight can brackets hold?
It depends on the size and screws used, but many support 25–50 lbs when properly installed.
Q: Can I reuse household items as rails or hooks?
Absolutely. Curtain rods, old shelving brackets, or even sturdy coat hooks can be repurposed.
Next Steps & Related Reading
To power your vertical garden outdoors, see Portable Power Solutions for Off-Grid Vertical Gardens.
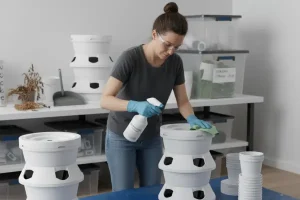
For long-term care, read How to Sterilize & Store Equipment Between Growing Seasons.
Conclusion
DIY mounting systems are affordable, practical, and customizable for any vertical garden. By combining brackets for strength, rails for flexibility, and hooks for simplicity, you can create a setup that’s both functional and stylish.
Would you build your garden with sturdy brackets for peace of mind, or a flexible rail system you can rearrange anytime?
Hi, I'm Evelyn. I grew up in a house, but life brought me to apartments. In vertical gardening, I’ve found a hobby full of life and fun challenges. It's a way to turn even the smallest space into a green retreat.