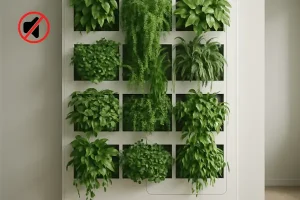
One of the biggest challenges in vertical gardening is watering. Because soil volume is limited, vertical setups dry out much faster than traditional beds. Hand watering can work, but it often leads to uneven moisture—plants at the top dry out while the bottom stays soggy.
That’s where drip-irrigation kits come in. These systems deliver small, steady amounts of water directly to plant roots, making them perfect for small-scale vertical gardens. This article will walk you through the benefits of drip irrigation, what to look for in a kit, and some of the best options available.
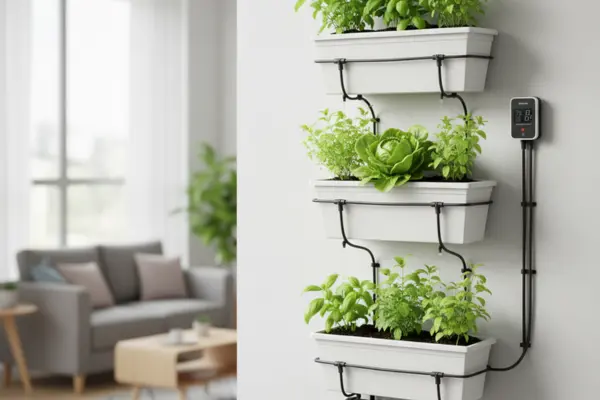
Before you buy, understand the basics: a small reservoir or tap connection feeds a pressure regulator, filter, and main line that splits to drip emitters or micro-tubing at each pocket. Add a simple battery or solar timer to automate cycles—short, frequent bursts keep lightweight media evenly moist without runoff.
Look for adjustable emitters (1–4 L/h), barbed fittings that won’t slip, and a fine mesh filter to block fertilizer grit. For tidy installs, use clips to route lines, and plan a monthly flush to clear salts and keep flow consistent from top to bottom.
Why Use Drip Irrigation in Vertical Gardens?
Water efficiency: Drip systems deliver water straight to the root zone, so less evaporates or runs off. That means lower water bills and fewer puddles on floors, balconies, or neighbors’ spaces.
Even coverage: Vertical setups dry fastest at the top. With emitters placed at each pocket, every plant—top to bottom—gets a consistent amount of moisture. No more crispy top row and soggy bottom tier.
Time-saving: Set a simple timer for short, frequent cycles and let the system do the rest. You’ll spend minutes per week checking lines instead of hand-watering daily.
Healthier plants: Consistent moisture prevents stress swings that cause wilting, yellow leaves, and blossom drop. Roots grow deeper and stronger when they aren’t flooded or starved.
Cleaner foliage: Water goes into the media, not onto leaves. Drier foliage means less mildew indoors and fewer fungal issues overall.
Nutrient control: In hydro or fertigation setups, drip lines deliver a steady dose of nutrients with minimal waste or salt buildup.
Easy scaling: Start with one panel and add more lines as your garden grows. Most kits are modular, so expanding is simple and affordable.
Key Features to Look for in a Kit
- Adjustable Emitters
Allow you to control water flow to different plants—useful if some need more than others. - Tubing Quality
Flexible tubing is easier to install and adjust in tight spaces. - Connector Types
Kits with multiple connectors (T-joints, elbows) make it easier to customize layouts for vertical towers or walls. - Water Source Compatibility
Some kits attach directly to faucets, while others work best with pumps or reservoirs. - Scalability
Choose a kit you can expand if your vertical garden grows.
Best Drip-Irrigation Kits for Small Vertical Gardens
1. Raindrip R560DP Automatic Drip Kit
- Comes with tubing, stakes, and adjustable emitters.
- Easy to connect to a faucet.
- Best for balconies and small patio gardens.
2. Flantor Garden Irrigation System
- Budget-friendly with customizable tubing and connectors.
- Suitable for DIY vertical setups.
- Works well with timers for automation.
3. MIXC Micro Drip Irrigation Kit
- Compact design with fine emitters for small containers.
- Great for herb walls or compact towers.
- Easy to cut and adapt to unique layouts.
4. Rain Bird Patio Drip Irrigation Kit
- High-quality components designed for durability.
- Adjustable flow for different plant types.
- Ideal for small but long-term vertical gardens.
Quick Comparison Table
| Kit Name | Best For | Key Features | Price Range |
| Raindrip R560DP | Small balconies | Faucet connection, adjustable emitters | $$ |
| Flantor System | Budget setups | Flexible tubing, DIY-friendly | $ |
| MIXC Micro Kit | Herb walls, small towers | Compact design, customizable | $ |
| Rain Bird Patio Kit | Long-term durability | High-quality parts, adjustable flow | $$$ |
Installation Tips
- Place emitters near the base of each plant.
- Use stakes to hold tubing in place on vertical panels.
- Pair with a timer for hands-free watering.
- Test the system before final setup to ensure even coverage.
Common Mistakes to Avoid
- Using too few emitters – some plants won’t get enough water.
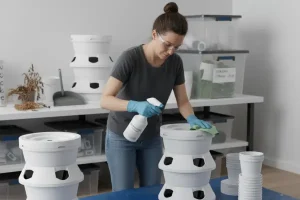
- Forgetting to flush lines – sediment can clog small tubes.
- Running water too fast – leads to runoff instead of absorption.
- Not adjusting for plant needs – thirsty plants like tomatoes may need more than herbs.
FAQs
Q: Can drip irrigation work indoors?
Yes, but always use trays or liners to catch excess water and prevent leaks.
Q: Do I need a pump for drip irrigation?
For small gardens connected to a faucet, no. Larger or reservoir-based systems may require one.
Q: How often should drip systems run?
Depends on the season—once a day in summer, every 2–3 days in cooler months.
Q: Are these kits easy to install for beginners?
Yes. Most kits are DIY-friendly and come with clear instructions.
Next Steps & Related Reading
For water delivery power, see How to Select the Right Water Pump for Your Vertical Garden.
If you want to automate further, check Installing & Calibrating pH and EC Meters in a Vertical System.
Conclusion
Drip-irrigation kits are one of the smartest upgrades for small vertical gardens. They save time, conserve water, and keep plants consistently healthy. Whether you choose a budget kit for herbs or a durable system for long-term use, drip irrigation makes gardening easier and more rewarding.
Would you prefer a ready-made kit for simplicity, or a customizable system you can expand as your garden grows?
Hi, I'm Evelyn. I grew up in a house, but life brought me to apartments. In vertical gardening, I’ve found a hobby full of life and fun challenges. It's a way to turn even the smallest space into a green retreat.