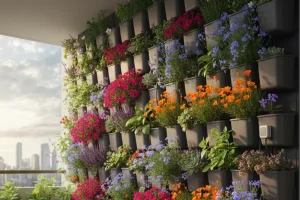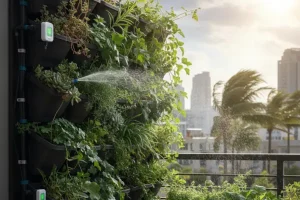
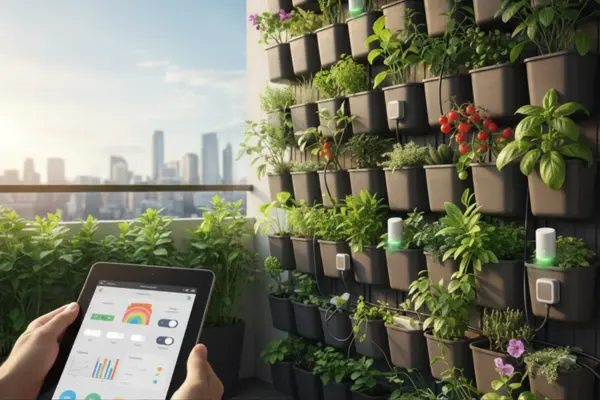
Want your vertical garden to water itself only when plants are thirsty, or switch grow lights on and off without you touching a thing? You don’t need a high-end controller. With a few budget sensors and a smart plug or two—each under $50—you can add real automation to walls, towers, and pocket planters.
This guide explains which inexpensive sensors are worth buying, how to pair them with smart plugs, and simple automations you can set up in one afternoon. We’ll cover moisture, light, and climate sensors, plus power control for pumps and lights. You’ll also get wiring safety tips, reliable schedules, and common mistakes to avoid.
Why budget automation matters
- Consistency = healthier plants. Small, steady routines beat occasional deep care.
- Fewer “oops” moments. Missed waterings, lights left on, or overheated rooms are easy to prevent.
- Scales with you. Start with one sensor and one plug, then add more as your vertical garden grows.
- Apartment-friendly. Plugs and sensors don’t require drilling or plumbing changes.
The core kit (under $50 each)
You don’t need every gadget on day one. Start with the one sensor that solves your biggest problem, then add more.
- Soil moisture sensor (analog or digital):
- Purpose: Tells you when the root zone is dry, moist, or wet.
- Use case: Soil-based vertical pockets, ladder shelves, and rail planters.
- Budget tip: Choose a model with two probes or a long probe for deeper pockets.
- Purpose: Tells you when the root zone is dry, moist, or wet.
- Ambient temperature & humidity sensor:
- Purpose: Alerts you to heat spikes and dry air that stress plants.
- Use case: Indoor walls, greenhouse corners, balconies with hot afternoon sun.
- Budget tip: Pick one with data logging or app charts so you can spot patterns.
- Purpose: Alerts you to heat spikes and dry air that stress plants.
- Light meter (lux/par proxy) or simple light sensor:
- Purpose: Checks if your wall gets enough light and whether grow lights are actually helping.
- Use case: Dim rooms, north-facing windows, winter growing.
- Budget tip: A lux meter or even a photoresistor light sensor tied to a routine can work.
- Purpose: Checks if your wall gets enough light and whether grow lights are actually helping.
- Smart plug (Wi-Fi or Bluetooth):
- Purpose: Turns pumps, fans, and lights on/off by schedule or sensor trigger.
- Use case: Any device that plugs into a wall outlet and draws safe, rated current.
- Budget tip: Look for energy monitoring so you see runtime and power use.
- Purpose: Turns pumps, fans, and lights on/off by schedule or sensor trigger.
- Smart power strip (optional):
- Purpose: Separate app-controlled outlets for, say, lights and pump on one bar.
- Use case: Indoor setups with multiple small devices.
- Purpose: Separate app-controlled outlets for, say, lights and pump on one bar.
Keep each item under $50 by watching for sales, two-packs, or basic models without premium features you don’t need.
Picking the right sensors for vertical setups
Moisture sensors: choose wisely
- Capacitive sensors (better): Measure moisture without metal tips that corrode. Good for consistent readings.
- Resistive sensors (cheapest): Work, but probes can corrode faster, especially in fertilizer-rich media.
- Placement: Insert probes halfway down the pocket where roots actually feed. For deep pockets, angle the probe to sample the middle, not just the surface.
- Calibration: Water thoroughly, wait 15 minutes, then note the “wet” value. Let the pot reach your normal “water again” point and note the “dry” value. That range becomes your personal scale.
Temperature & humidity: the indoor essential
- Position: Mount the sensor beside the plants at leaf height, out of direct sun and away from dripping water.
- What to watch:
- Heat spikes above 85°F (29°C) for many greens and herbs.
- Low humidity below 35% can stress basil and mint indoors; consider a small tray of water or a short fan cycle for airflow balance (not misting at night).
- Heat spikes above 85°F (29°C) for many greens and herbs.
Light: enough, too much, or just right?
- Target lux numbers (quick rule of thumb):
- 10,000–20,000 lux: minimum for leafy herbs with supplemental light
- 20,000–40,000 lux: comfortable for most herbs/flowers
- 10,000–20,000 lux: minimum for leafy herbs with supplemental light
- Placement: Measure at the leaf surface, not mid-air. Repeat at different times of day to see the real average.
- Automation hint: Use a smart plug schedule to top up light hours (e.g., 12–14 hours total).
Smart plugs: your simple control center
A smart plug is the “on/off switch” your sensors talk to (directly or indirectly). Even if your sensors don’t automate natively, you can still set reliable schedules and adjust them weekly based on readings.
What to check before buying:
- Amperage and watt rating: Make sure it exceeds your pump/light draw. Small pumps are usually fine; some grow lights need more.
- App compatibility: Use the same app/brand for all plugs if possible. Fewer apps = fewer headaches.
- Network needs: 2.4 GHz Wi-Fi is common. If your router splits bands, connect the plug to the 2.4 GHz network.
- Manual override: A physical button on the plug is handy for quick tests.
Five beginner automations (copy these ideas)
1) Moisture-informed watering window (soil pockets)
- Hardware: Moisture sensor + smart plug + small pump (or a gravity solenoid on a plug).
- Routine:
- Set the pump on a once-daily 2–4 minute window (morning).
- If moisture reading is below your “dry” threshold, run the pump; if not, skip.
- If your app can’t link the sensor and plug directly, you act as the logic: check the sensor graph each night; if average is low, extend tomorrow’s schedule by a minute; if high, shorten it.
- Set the pump on a once-daily 2–4 minute window (morning).
2) Grow light top-up by hours
- Hardware: Light meter (or simple observation) + smart plug for the light.
- Routine:
- Program 12–14 hours/day on the plug.
- On bright days, you can manually shorten by 1–2 hours; on dull days, let the schedule run full.
- Keep lights 8–12 inches above the canopy; raise as plants grow.
- Program 12–14 hours/day on the plug.
3) Heat wave protection
- Hardware: Temp/humidity sensor + smart plug for a clip fan.
- Routine:
- If temp is >85°F (29°C), run the fan 15 minutes each hour until temperature drops.
- At night, stop the fan or run 5 minutes/hour to keep gentle airflow without over-drying.
- If temp is >85°F (29°C), run the fan 15 minutes each hour until temperature drops.
4) Humidity help for tender herbs
- Hardware: Temp/humidity sensor + smart plug for a small cool-mist humidifier placed away from leaves (indirectly raising room RH).
- Routine:
- If RH <35% for more than an hour, run 10 minutes ON / 50 minutes OFF for 2–3 cycles, then reassess.
- Avoid nighttime leaf-wetting; keep the humidifier from blowing directly on plants.
- If RH <35% for more than an hour, run 10 minutes ON / 50 minutes OFF for 2–3 cycles, then reassess.
5) Watering “lockout” at night
- Hardware: Smart plug for pump.
- Routine:
- Create no-watering hours (e.g., 10 p.m.–6 a.m.).
- This prevents wet leaves and reduces fungus risk on dense walls.
- Create no-watering hours (e.g., 10 p.m.–6 a.m.).
Step-by-step setup (afternoon project)
1) Map your outlets and loads
- List what you’ll control: pump, lights, fan/humidifier.
- Check each device’s watt/amp rating; compare with your plug’s rating.
2) Install the smart plug
- Connect to Wi-Fi using the app instructions.
- Name the plug clearly: “Wall Pump,” “Grow Light,” “Fan.”
3) Place and pair sensors
- Insert a capacitive moisture sensor in a mid-level pocket (typical moisture for the wall).
- Mount temp/humidity at leaf height, away from direct sun.
- If your app allows, create notifications for high temp or low moisture.
4) Create your first schedule
- Lights: 12–14 hours/day.
- Pump: 2–4 minutes once in the morning (adjust weekly).
- Fan: off normally; a manual button or temp rule handles heat spikes.
5) Test and observe
- Run a manual pump cycle to check for leaks and even flow.
- Note moisture readings before and 30 minutes after watering.
- Adjust the next day’s duration based on how wet the mid-pocket stays.
Tips to keep it accurate (and under $50)
- Group purchases: Sensor two-packs are often cheaper per unit.
- Battery planning: Many budget sensors run on AAA/CR2032 cells. Keep spares; low batteries = flaky readings.
- Label everything: Use painter’s tape on plugs and cords so you never unplug the wrong device.
- Log your changes: A tiny notebook or phone note—date, pump minutes, sensor average—helps you dial in settings fast.
Safety first (always)
- Drip loops: Make a U-shaped loop in every cord so water runs to the floor, not into outlets.
- GFCI outlets: Use a GFCI where moisture is present (kitchen, bath, patio).
- Rated extension cords only: No skinny, unsafe cords for pumps or lights.
- Ventilation for enclosed plugs: Don’t bury smart plugs behind insulation or inside sealed cabinets; they need airflow.
- Keep apps updated: App updates often fix connection bugs.
Troubleshooting quick wins
- Pump turns on but no flow: Check clogged emitters, kinked tubing, or a clogged intake screen. Reduce fertilizer strength if biofilm builds up.
- Sensor says “wet,” plants look droopy: Probe might be too shallow, or water is pooling above a root ball. Reinsert deeper and check drainage holes.
- Wi-Fi drops often: Move your router closer, use a 2.4 GHz band, or try a plug with Bluetooth fallback for schedules.
- Uneven watering across the wall: Add a second moisture sensor in a drier column; base your schedule on the driest typical pocket.
Conclusion: Small tech, big results
With one smart plug and one or two budget sensors, your vertical garden becomes calmer and more reliable. Moisture sensors stop guesswork. Temperature/humidity sensors warn you before plants sulk. Smart plugs keep lights and pumps on time—even when you’re busy. Start simple: lights on a schedule, pump in a morning window, and a moisture probe in a representative pocket. Add a fan rule for heat waves, and you’ve automated the basics for well under $100 total.
Hi, I'm Evelyn. I grew up in a house, but life brought me to apartments. In vertical gardening, I’ve found a hobby full of life and fun challenges. It's a way to turn even the smallest space into a green retreat.